Although it stays in place longer than conventional varnish, semi-permanent varnish must be removed after a while. So, when should we remove semi-permanent varnish? In this article, your nail supply expert Maryton will tell you the answer. The semi-permanent varnish must be removed between 15 days and 3 weeks. You will see it with your eyes since it is the nail regrowth time. It won’t be aesthetic. You will therefore know that it is time to remove your semi-permanent varnish even if you are a fan of its color. To remove semi-permanent varnish without damaging the nails, keep in mind that don’t scratch under any …
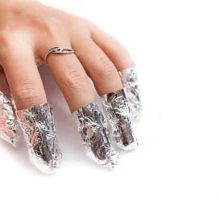
As we all know, a semi-permanent varnish can last up to 2 weeks, or even 3 after it has been applied. Beyond this period, our regenerated nails force you to remove the varnish. There are now two effective options for removing semi-permanent varnish, which your nail supply expert Maryton will explain in detail in this blog. Removing semi-permanent nail polish is painless when you follow a few simple rules. Even if you are in a hurry, you must avoid scratching your semi-transparent varnish at all costs because it damages the nails. The first removal technique is very precise and requires skill. It is first …
The question that comes up most often, when we talk about gel nails, relates to whether gel nails are harmless. This blog will give answers. Keep reading! Like every pose of false nails, we can always count risks, because the natural nail is fragile. However, you will be placed in the hands of experts who know their job and know what they have to do. No need, therefore, to worry, because if you follow their advice, there is no reason for your pose to go wrong. In addition, it is important to note that the products used for the installation of …
In this blog, we are going to explain how to apply polygel on your nails step by step. To give your polygel nails more durability, it is best to use a rubber base under the acrylic gel. It ensures an even better adhesion to the natural nail plate. Step 1: Degrease the nails with a nail prep after preparing the nail plate. Depending on the type and condition of the nail plate, apply the correct primer. Step 2: Apply a layer of base, cure in lamp (LED 30-60s / UV 120-180s). Step 3: Apply a stencil in the right place. Using the …